Python has become one of the most popular programming languages in the world, thanks to its simplicity, versatility, and a vast ecosystem of libraries and frameworks. Python’s key strengths is its extensive standard library, which provides ready-to-use modules and functions for various tasks, ranging from file I/O to web development and data manipulation. So Whether you’re a developer or just starting your coding journey, first step is to install Python in Windows system to unlock its full potential. This guide will walk you through the installation process step-by-step, ensuring a smooth install Python in Windows.
Step 1: Downloading the Python Installer
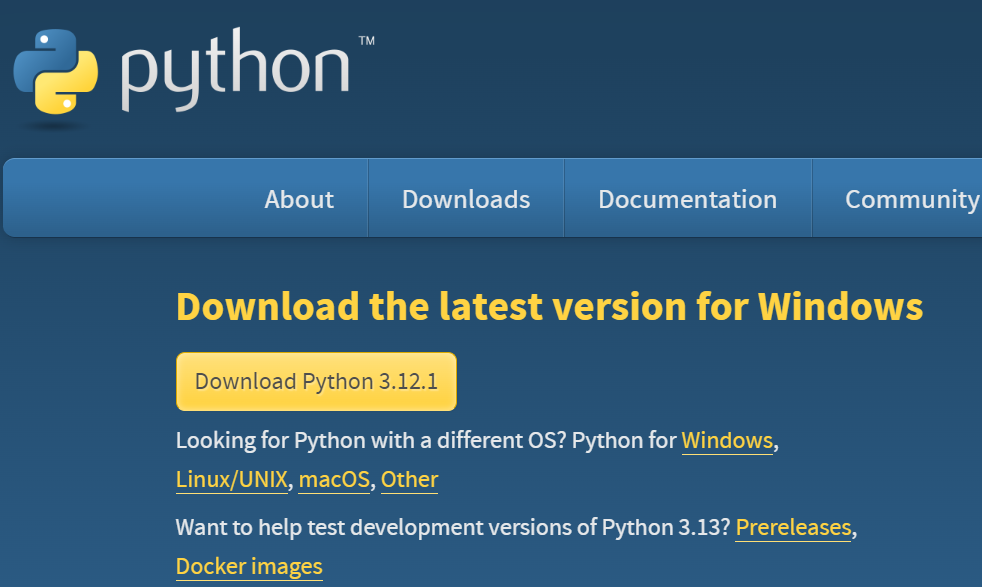
To begin the installation process, you need to download the Python installer from the official Python website. Follow these steps:
- Open your web browser and navigate to https://www.python.org/downloads/.
- On the Downloads page, click on the “Download Python” button.
- Select the latest version of Python for Windows and click on it to initiate the download.
Step 2: Running the Installer
Once the installer is downloaded, follow these steps to run it:
- Locate the downloaded installer file, usually named something like “python-3.12.1.exe,” in your Downloads folder or the location where you saved it.
- Double-click on the installer file to launch the installation wizard.
Step 3: Configuring the Python Installation
During the installation process, you’ll be presented with several configuration options. Here’s what you need to do:
- On the first screen of the installer, ensure that the “Add Python x.x to PATH ” option is checked. This option is crucial as it allows you to run Python from the command line.
- Click on the “Install Now” button to proceed with the default installation settings.
Step 4: Verifying the Installation
Once the installation is complete, it’s essential to verify that Python has been installed correctly. Here’s how you can do it:

python --version- Open the Command Prompt, type the above command and hit Enter.
- If Python is installed correctly, you should see the version number displayed on the screen shown like the image above.
You may also check the Python version by launching the IDLE application Go to Start, type IDLE into the search box, and then choose the IDLE application, for example, IDLE (Python 3.12.1 64-bit). If you see the Python IDLE window, you’ve successfully downloaded and installed Python on Windows.

Step 5: Setting Up a Virtual Environment (Optional)
Setting up a virtual environment is highly recommended to keep your Python projects isolated and maintainable. Here’s how you can create a virtual environment:
- Open the Command Prompt and navigate to the directory where you want to create the virtual environment.
- Type the following command and press Enter:
python -m venv myenvReplace “myenv” with the desired name for your virtual environment.
Conclusion:
Congratulations! You’ve successfully learnt how to install Python in Windows. From web development to machine learning, Python’s versatility shines through, empowering you to tackle diverse projects with ease.
Moreover, coding with Python isn’t just about writing lines of code; it’s about problem-solving, creativity, and continuous learning. Python’s clean syntax and readability make it a joy to work with, fostering a conducive environment for collaboration and innovation. So begin your coding journey with this guide today.
Check out this article here https://ppdadesigns.com/how-to-install-fonts-in-vs-code-easy-steps/ if you would like to install new fonts in VS Code. Happy Coding!